If you’ve decided to jump ship and try Gmail, you’ll want to take your stuff with you. Rather than copy all your emails and contacts manually, you can make Gmail and Yahoo! Mail do the hard work for you.
Below is a step-by-step guide to automatically transferring all your emails and contacts from Yahoo! Mail to Gmail. Before you begin, make sure you’ve already got a Gmail account set up. You won’t be able to move your stuff until you’ve got a live Gmail account.
The next thing to do is make sure all your Yahoo! Mail emails are in your inbox. Gmail can’t take emails out of your folders, so just move them all into your inbox before following the steps below.
How to switch from Yahoo! Mail to Gmail without losing your stuff
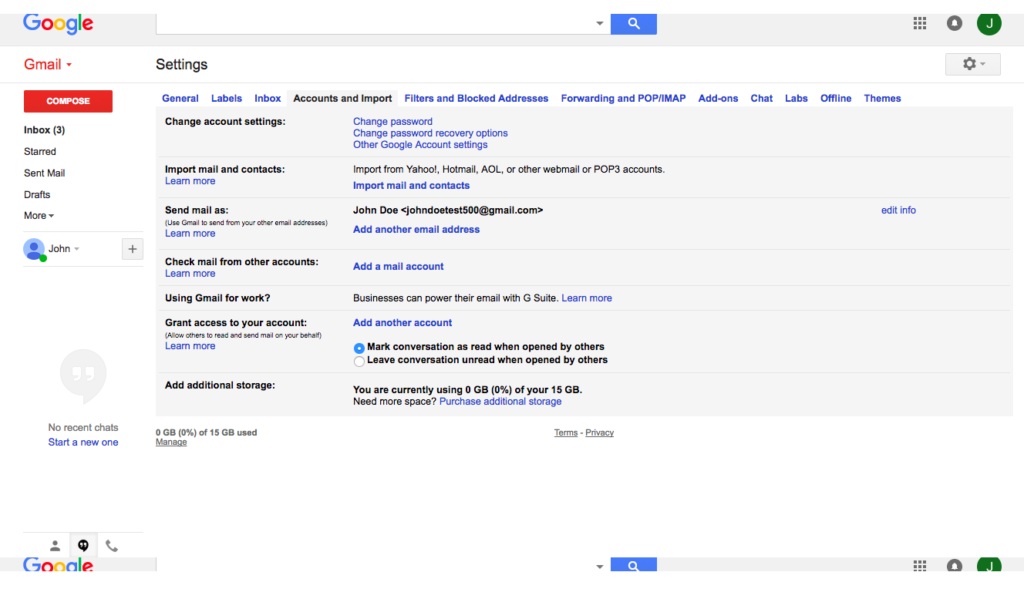
Step 1. In Gmail, click the little gear symbol at the top right and select Settings. You’ll be taken to the General settings tab, but you should then click Accounts and Import.
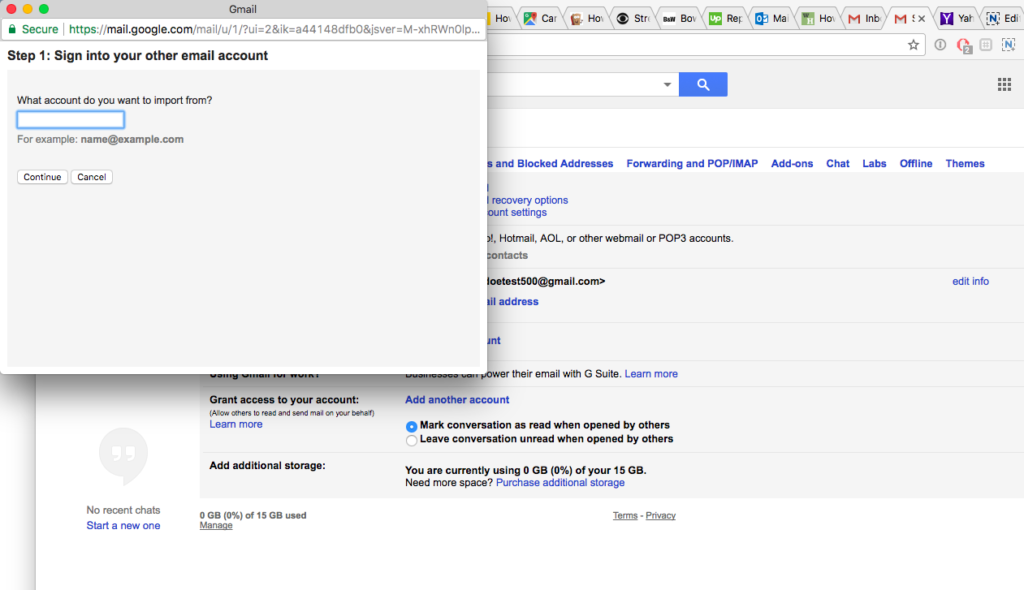
Step 2. Now click on Import mail and contacts. This generates a pop-up that will ask you for the email address of the account you want to import. In the example, I’m importing from a Yahoo! Mail test account called johndoetest50@yahoo.com – so that’s what I entered here.
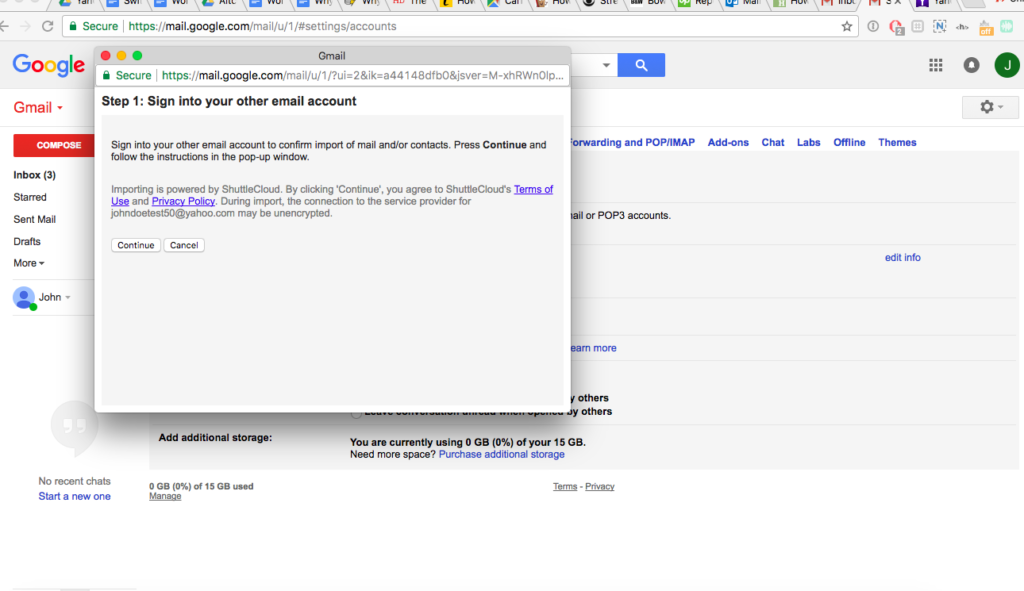
Step 3. Once you’ve entered your Yahoo! Mail email address, you’ll be asked to sign into your Yahoo! Mail account to confirm the transfer.
Gmail also warns that your emails might lose encryption during the transfer process, but this is unlikely since ShuttleCloud – the service handling the transfer – encrypts all your data (according to their website).
Once you’ve signed into Yahoo! Mail, click Continue.
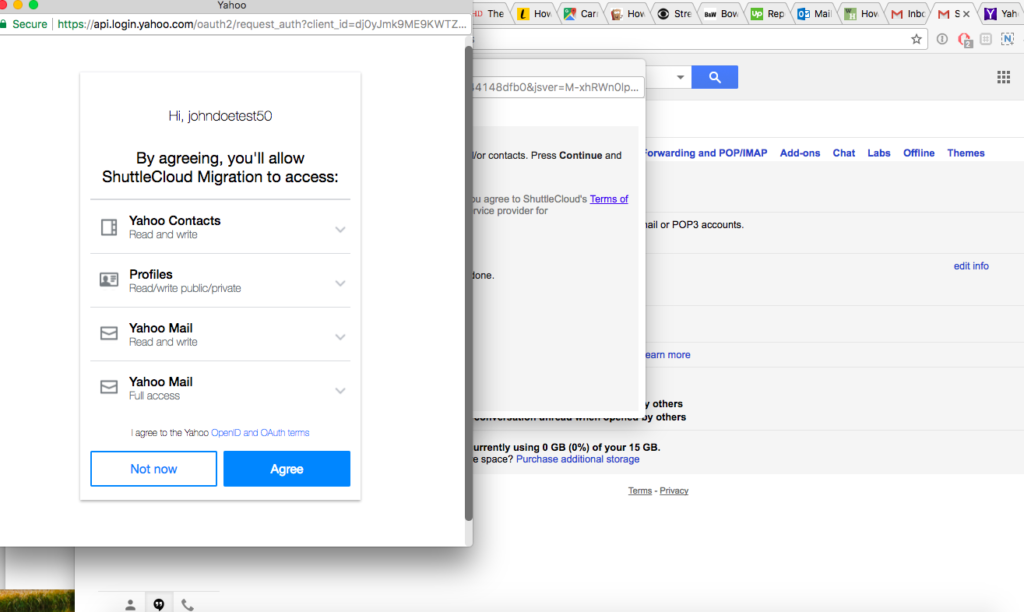
Step 4. Now you’ll get another pop-up asking you to give ShuttleCloud access to your Yahoo! Mail account. Click Agree.
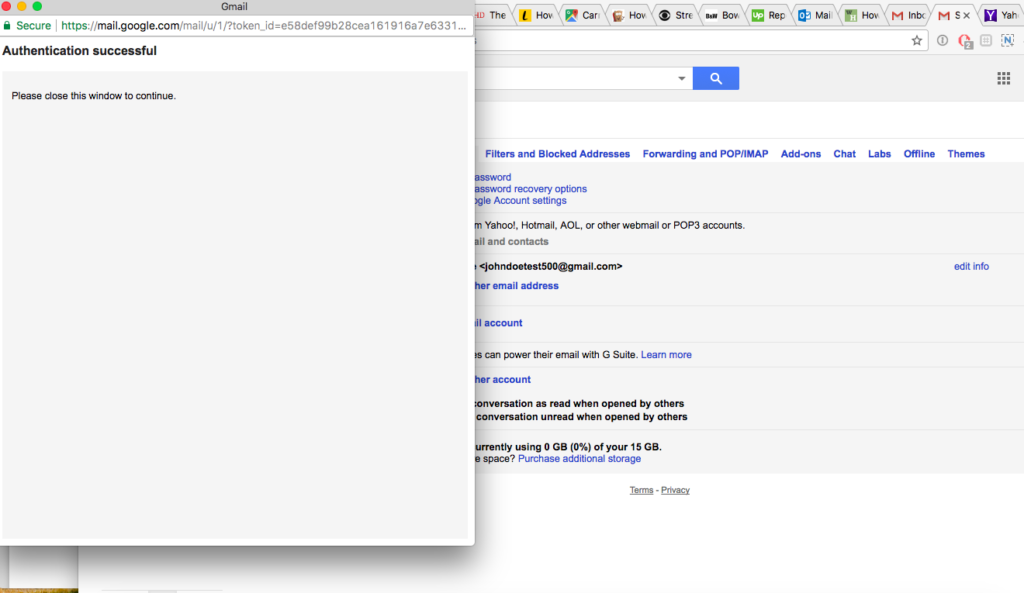
Step 5. If everything goes well, you’ll get an “Authentication successful” message, asking you to close the window. So go ahead and close it.
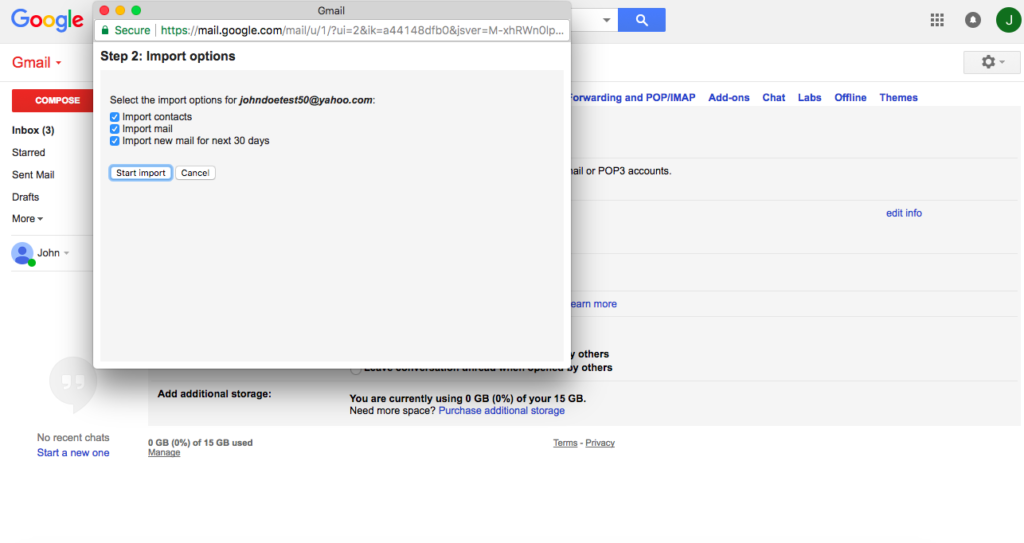
Step 6. You’ll return to the original pop-up where you must choose what to import. Gmail also suggests importing any new mail you get for 30 days. This is handy if you haven’t gotten around to giving everyone your new Gmail address.
Once you’ve chosen what you want to import, click Start Import.
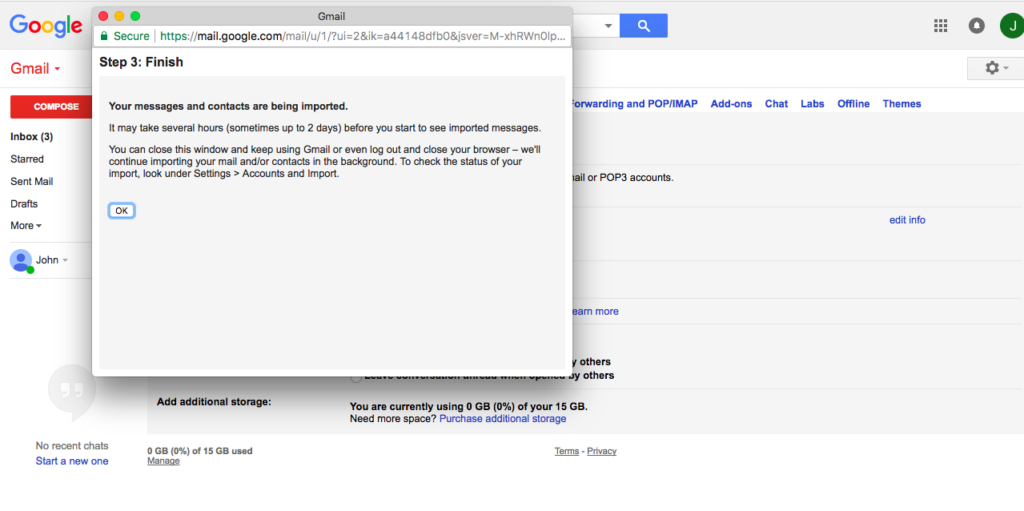
Step 7. You’ll see a message confirming that your emails and contacts are being imported, and how long it might take to complete. It could be hours or days, depending on how big your Yahoo! Mail inbox and address book are. The good news is you don’t need to be signed in. Gmail will continue to import your stuff even if you log out.
And that’s it. Once everything has been imported, you’ll see it in your Gmail inbox. All your emails will be automatically labeled with the email address they were imported from, which will make organizing your Gmail inbox that much easier.
Related: